
Add a dropdown list to a SAP dynpro screen using the Listbox option
The following steps will show you how to create a basic SAP dynpro program and add a selectable list box to it. If you already know
the basics of creating a dialog screen can probably just look at step 6 to create the field and step 9 to get the code for
your PBO module which populates your dropdown list
Step 1 - Create New dialog Program
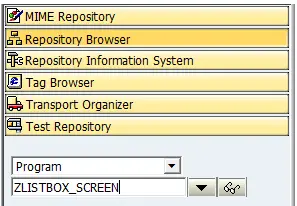
Within transaction SE80 select program from the dropdown and enter a Z name for your custom SAP program.
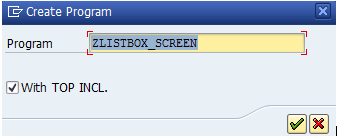
Now press enter and select "With TOP INCL." and press the green tick
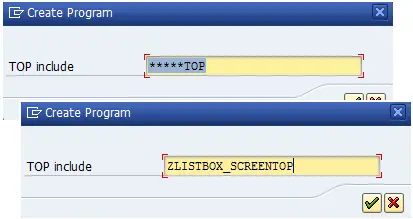
Enter a name for your top include and press the green tick
On the attributes screen simply check there is a title and press the save button

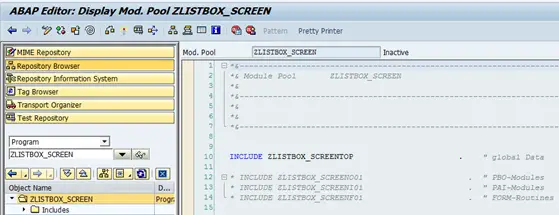
Step 2 - Program created!
You have now created your basic program and should look something like this
Step 3 - Create a screen for your dialog program
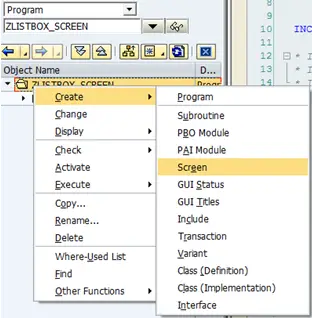
The next step is to add a screen to your program. To do this just right click on the program name
and select Create->Screen
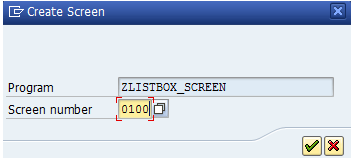
On the next window enter a screen number (i.e. 0100) and press the green tick
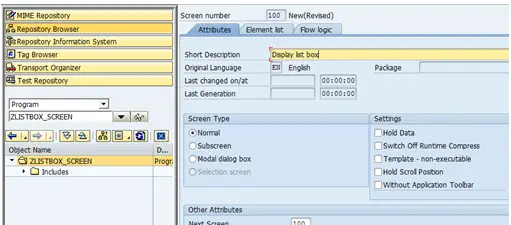
Next enter a short title and press save (in the top application toolbar!)
Step 4 - Screen layout
Now you need to add a field to your new screen. You do this within the Layout section of screen painter, which is accessed via the
"Layout' button on the application toolbar.

Step 5 - Add dropdown field (Listbox)
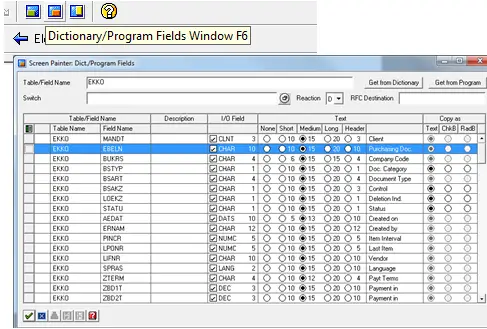
I am going to base my field on ekko-ebeln which simply requires you to go to the 'dictionary/Program fields
window' (blue & red square), enter EKKO as the table entry and select the EBELN field. You can then drop the
selection anywhere on the screen.
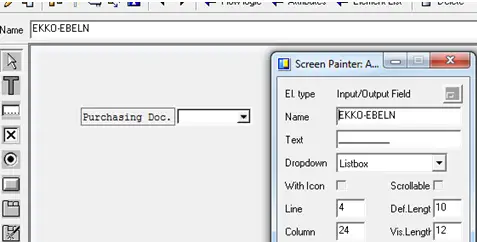
Step 6 - Update field attributes
Now double click on the input field so that the attributes window appears. Update the Dropdown attribute so that it is
set to Listbox
Step 7 - Save and Activate
Now save and activate your screen. Once this is done exit out of the screen layout section and go to the flow logic tab.
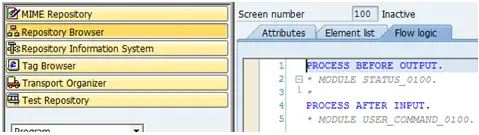
Step 8 - Create PBO module
Create a PBO module which will contain all the code that will be executed before the screen is displayed to the user.
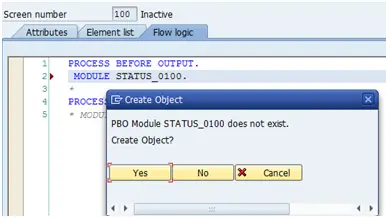
i.e. this is where we will be populating the dropdown list. In order to do this simply un comment the '* MODULE STATUS_0100'
line and double click on STATUS_0100 and press yes to creating the object.
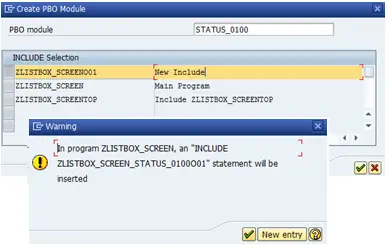
Now you need to choose which include the code will be stored in, the standard for this is to create a new include ending in
'O01' such as ZLISTBOX_SCREENO01. Press the green tick and again on the following warning.
Step 9 - Insert the ABAP code
Now add the following ABAP code to the PBO module you have just created.
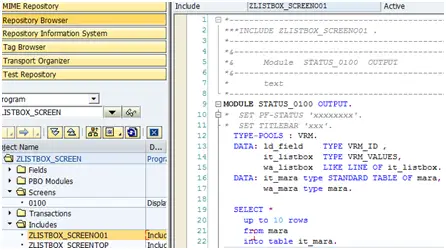
*----------------------------------------------------------------------*
***INCLUDE ZLISTBOX_SCREENO01 .
*----------------------------------------------------------------------*
*&---------------------------------------------------------------------*
*&      Module  STATUS_0100  OUTPUT
*&---------------------------------------------------------------------*
*       text
*----------------------------------------------------------------------*
MODULE STATUS_0100 OUTPUT.
*  SET PF-STATUS 'xxxxxxxx'.
*  SET TITLEBAR 'xxx'.
  TYPE-POOLS : VRM.
  DATA: ld_field    TYPE VRM_ID ,
        it_listbox  TYPE VRM_VALUES,
        wa_listbox  LIKE LINE OF it_listbox.
  DATA: it_mara type STANDARD TABLE OF mara,
        wa_mara type mara.
  SELECT *
    up to 10 rows
    from mara
    into table it_mara.
  loop at it_mara into wa_mara.
    wa_listbox-key = wa_mara-matnr.
    wa_listbox-text = wa_mara-matnr.
    append wa_listbox to it_listbox.
  endloop.
  ld_field = 'EKKO-EBELN'.
  CALL FUNCTION 'VRM_SET_VALUES'
    EXPORTING
      id     = ld_field
      values = it_listbox.
ENDMODULE.                 " STATUS_0100  OUTPUT
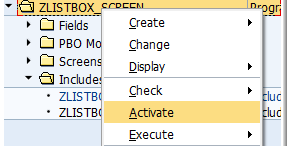
Step 10 - Activate
Right click on the program name and selecting Activate
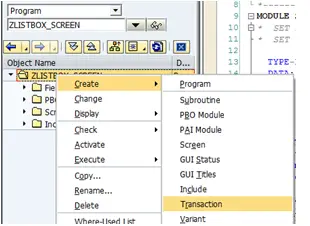
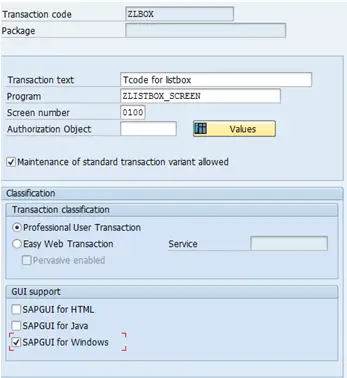
Step 11 - Create transaction code
Now create a tcode for your program by right clicking on the program name and selecting Create->Transaction
Enter a tcode such as ZLBOX and select 'Program and screen (dialog transaction)
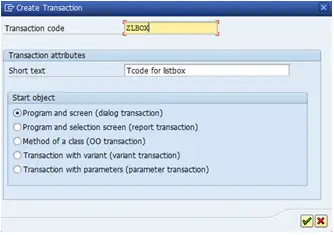
Enter text, program and screen number as those you have just created, Also tick at least the SAPGUI for windows
checkbox and press save.
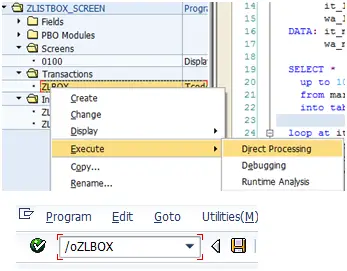
Step 12 - Execute
You can now execute your transaction by typing it in the command box in the top left hand corner or
right clicking on the tcode and selecting Execute->Direct Processing.
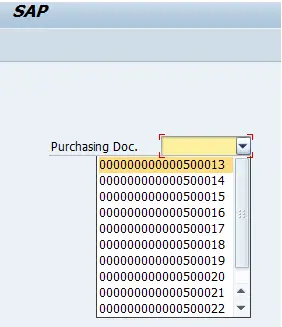
The result should look somthing like this
Adddropdown list to report selection screen
Related Articles
Insert image onto SAP screen
Insert image onto SAP screen
Creating your first ABAP dialog screen program in SAP
SAP ABAP dynpro programs, dialog screen programs with input fields, buttons, OO ALV grids etc..
SAP ABAP dynpro programs, dialog screen programs with input fields, buttons, OO ALV grids etc..
SAP dialog screen / dynpro Exit Command
Dialog programming, dynpro screen field validation
SAP Graphics Development - Example code and information on various areas of graphics development
Grouping SAP dynpro screen radiobuttons
Implementing a subscreen to an ABAP dynpro screen with SAP
F4 help functionality for a dynpro screen field using the PROCESS ON VALUE-REQUEST statement
